Chinese Weapons Training: Build Wrist Control with Saber Drills
Build control before adding speed
A Chinese saber can feel light during a slow cut, then suddenly pull the arm wide when speed increases. The problem is rarely “weak wrists” alone. More often, the hand has lost its relationship with the forearm, the edge has drifted away from its intended line, or the saber has not been guided back into a stable guard after the cut.
For intermediate practitioners, Chinese Weapon training should begin with control rather than display. A dao is not simply held by the hand; it is guided by the whole body. The fingers secure the handle, the wrist directs its angle, the elbow supports the path, and the waist gives the movement purpose. When those parts act out of sequence, the blade can pull the practitioner off line.
At SJF Kung Fu School, weapon practice is taught as part of a wider study of body method, discipline, and Wu De, the martial virtue that asks a practitioner to train with restraint and respect. Master Shen Jiangfei is a descendant of Liuhe Quan and the 11th-generation inheritor of Chen-style Tai Chi. This background matters because the same principles seen in empty-hand work—rooting, coordinated turning, and calm attention—also shape sound saber handling.
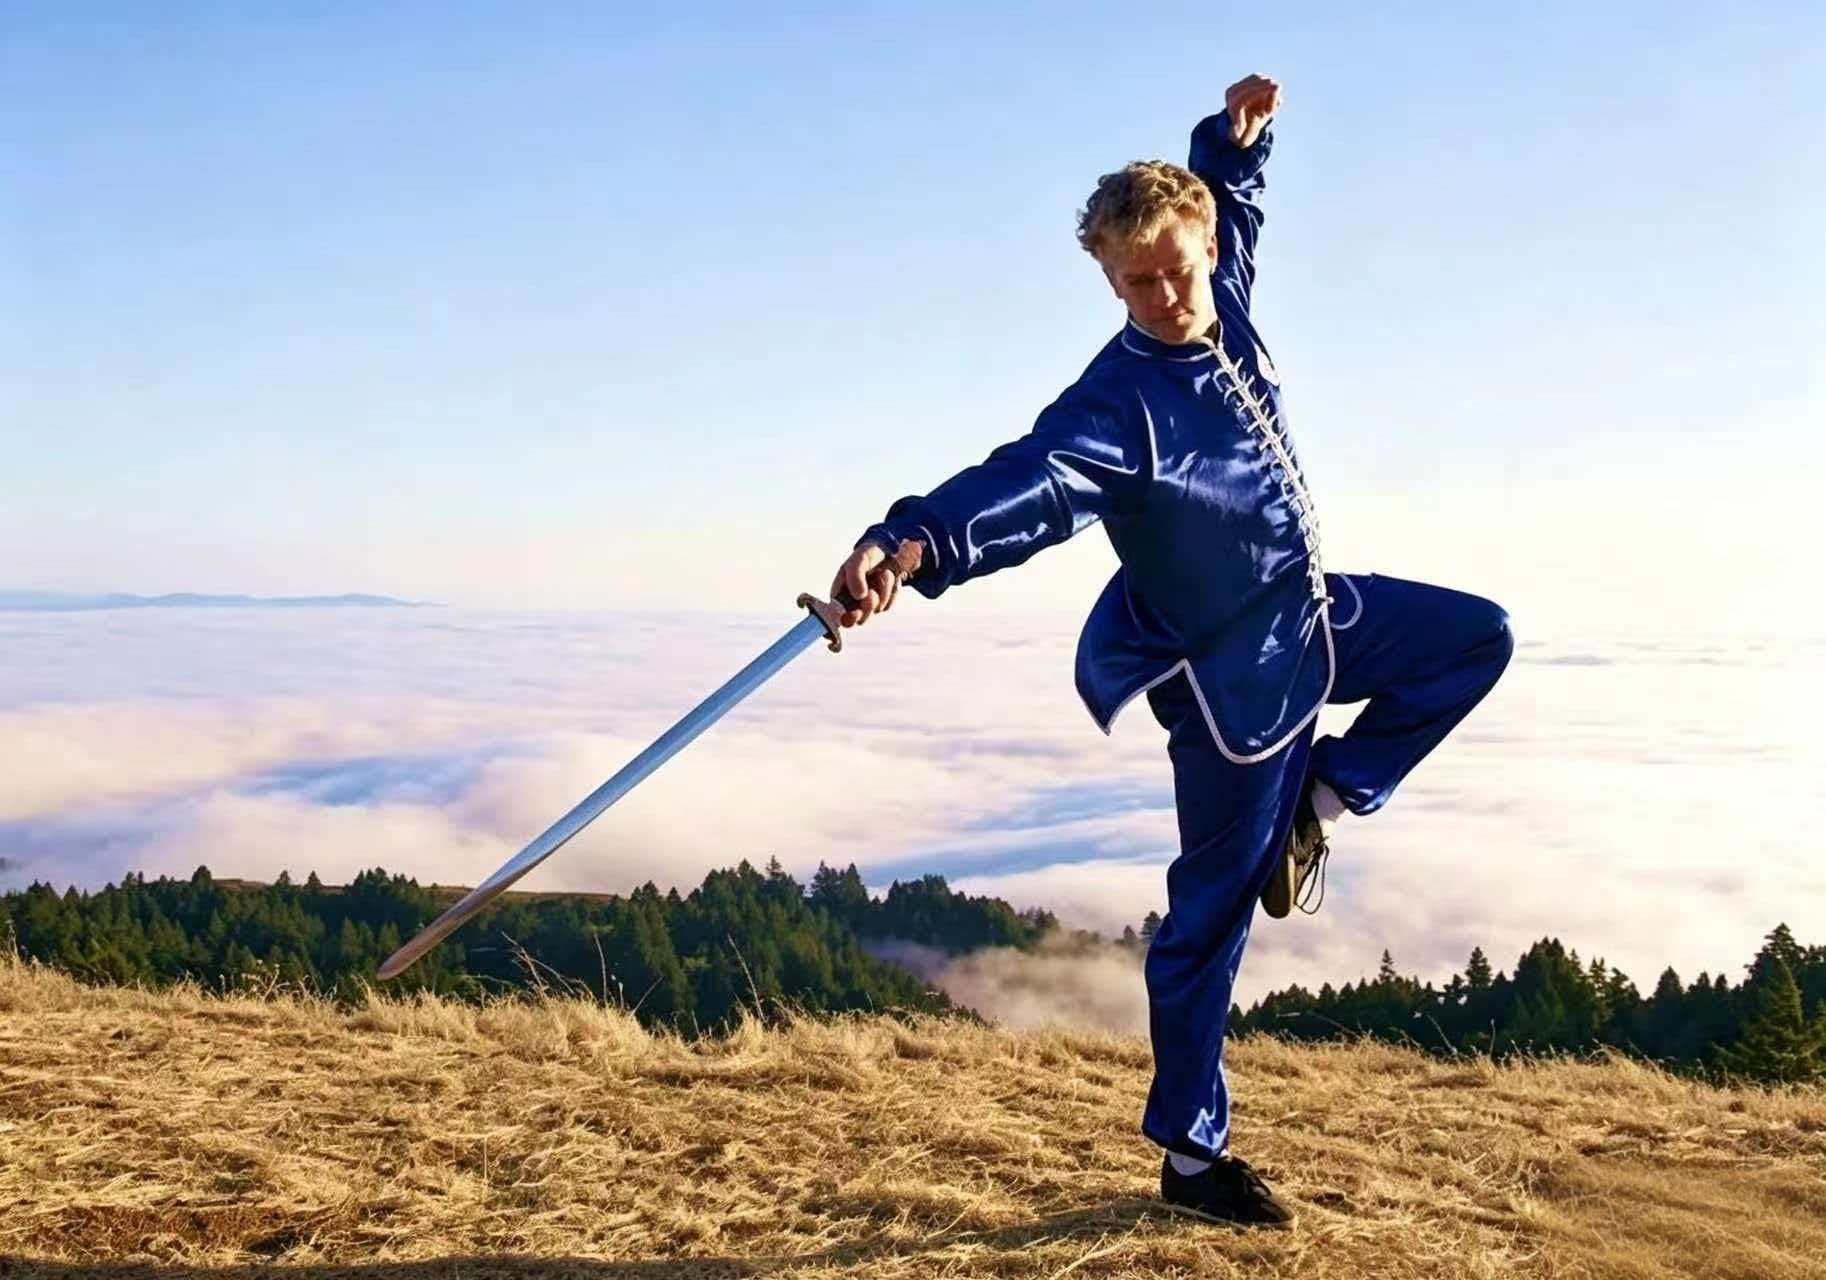
The direct answer is simple: keep the wrist structurally connected to the forearm, maintain awareness of where the saber edge is facing throughout each path, and finish every cut with a deliberate return to guard. Train these elements slowly enough that you can correct them. Speed is useful only after the saber stops pulling your shoulder, elbow, or torso away from the intended direction.
How wrist alignment, edge tracking, and controlled recovery drills reduce strain and prevent the saber from pulling the practitioner off line
These three elements work together. Treating them as separate skills creates a common problem: a student may hold a good wrist position at the start, yet lose the edge during the cut and then wrench the weapon back with the shoulder. The result is a movement that looks forceful but lacks order.
| Training element | What to observe | Practical effect | What happens when it is misunderstood |
|---|
| Wrist alignment | The hand and forearm remain connected without excessive bending, gripping, or collapse. | Force from the body can travel through the arm into the saber with less unnecessary tension. | A bent or limp wrist forces the forearm and shoulder to compensate. The cut may feel heavy, and the hand may tire quickly. |
| Edge tracking | The practitioner knows the edge direction during the lift, cut, turn, and guard. | The saber follows a readable line and can be redirected without guessing. | The blade rolls unpredictably. A recovery then becomes a large arm movement instead of a controlled return. |
| Controlled recovery | After the intended cut, the hand guides the saber back to a useful position before the next action. | The body remains balanced and prepared for a follow-up, retreat, or change of angle. | The weapon continues swinging after the cut and pulls the torso, feet, or shoulder out of position. |
Wrist alignment: connected does not mean rigid
Place the handle securely in the hand, with the fingers closed enough to prevent slipping but not clenched as if gripping a barbell. The wrist should not be sharply folded toward the thumb side or little-finger side. Instead, seek a line in which the knuckles, wrist, and forearm cooperate.
The conclusion is not that the wrist must remain frozen. A saber requires small adjustments through circles, wraps, and changes of direction. The point is that adjustment should be intentional. If the wrist bends because the weapon’s momentum has taken over, the practitioner is reacting late. This is especially relevant during descending cuts and diagonal cuts, when gravity and the saber’s arc can encourage the hand to collapse.
Use a smaller range of motion if you are rebuilding control after soreness, fatigue, or a long break from weapons. This approach does not replace medical advice for pain or injury. Stop training if a movement produces sharp pain, numbness, or persistent discomfort.
Edge tracking: know where the blade is facing
Edge tracking means maintaining visual and tactile awareness of the saber’s cutting orientation. Before every drill, identify the edge and spine of your dao. Then move slowly enough to answer a practical question at any point: “Where is the edge facing now?” If you cannot answer, reduce speed and simplify the path.
A frequent misunderstanding is to focus only on the beginning and end of a cut. Yet the middle matters. A blade that begins with correct orientation but rolls halfway through the path changes the meaning of the technique. The recovery may also become awkward because the hand must first locate the edge before it can guide the weapon home.
Controlled recovery: the cut is not finished at extension
Each strike should have a defined destination, but it should also have a defined return. After the saber reaches its intended point, let the elbow soften slightly, use the forearm and wrist to guide the blade, and bring the weapon back toward a stable guard. Avoid yanking it back with the shoulder.
This matters most for practitioners who enjoy large, sweeping cuts. A broad circle has value in forms practice, but it must not become a loose circle. If the saber continues far beyond the intended line, shorten the follow-through before trying to make the movement faster or lower.
A four-drill progression for steadier saber handling
Practice with enough clear space that no person, wall, furniture, or hanging object is within the weapon’s path. Use a training saber suitable for practice, and inspect the handle and guard before starting. A loose handle changes your feedback and can hide a control problem.
Still-position alignment check
Stand in a comfortable stance with the saber held in a simple forward guard. Relax the shoulder. Check whether the wrist is sharply bent, whether the grip is excessive, and whether the elbow is locked. Hold for several calm breaths, then release and repeat from the other side if your form uses both sides.
Purpose: establish a repeatable baseline before moving.
Best for: practitioners whose hand becomes tense as soon as they pick up the dao.
Limit: stillness cannot teach recovery by itself; continue to moving drills.
Slow vertical edge path
From guard, raise the saber on a modest vertical path and lower it along the same line. Keep the movement small. Pause briefly at the top, halfway down, and at the finish. At each pause, identify the edge direction and check that the wrist remains connected to the forearm.
Purpose: train awareness during the middle of a movement, not merely at the endpoints.
Best for: correcting blade roll during basic cuts.
Limit: do not confuse a slow drill with a fighting application; its role is precision.
Diagonal cut and return
Choose one diagonal line. Begin from guard, make a measured descending cut, stop without locking the elbow, then guide the saber back to guard by reversing the path in a smaller, calmer arc. Keep the torso facing the direction intended by the form rather than allowing the weapon to twist you sideways.
Purpose: connect edge tracking to a controlled recovery.
Best for: students who finish cuts with the weapon hanging too far away from their body.
Limit: if the saber feels too heavy to return smoothly, reduce the range before tightening the grip.
Three-cut balance sequence
Perform one vertical cut, one diagonal cut, and one horizontal or level-path cut appropriate to your training set. After each cut, recover to guard and pause long enough to confirm posture, edge direction, and breath. Do not accelerate until all three recoveries remain equally calm.
Purpose: test whether control remains present when directions change.
Best for: the skill-building stage before linking longer routines.
Limit: keep the sequence short when fatigue appears; tired repetitions often teach compensation.

For a useful training rhythm, practice the first three drills before a form or set. This places attention on mechanics while the hands are fresh. Afterward, apply the same checks to your existing Dao Fa material. The aim is not to add many new movements. It is to make familiar movements more reliable.
Use stance and breath to keep the saber from taking command
Wrist control cannot be separated from the lower body. If the feet are unstable, the hand often tries to solve the problem alone. If the shoulders rise with each cut, the arm becomes the main source of effort. A saber then feels heavier than it needs to feel.
Before the first cut, settle your stance. Let the knees remain easy rather than locked. Keep the head upright and the chest free from unnecessary tension. As the saber moves, allow the waist to participate in the direction of the cut, but do not throw the torso after the blade. The body supports the weapon; it should not chase it.
This principle has a close relationship with Zhan Zhuang practice. Standing work helps practitioners notice where they habitually tighten the hands, lift the shoulders, or lose contact with the ground. It is not a substitute for weapon drilling, but it can make the still points in saber practice clearer.
Breathing should remain natural. Do not hold the breath to force stability. A held breath may create a brief feeling of strength, but it often stiffens the neck and shoulders. Use a calm exhale as the cut completes, then breathe normally during recovery. This fits controlled drills; it may not match every rhythm used in a specific form or class.
A practical worked example: the saber pulls right after a left diagonal cut
Imagine a right-handed practitioner making a left diagonal descending cut. The blade finishes low, the wrist bends inward, and the torso turns farther left than intended. The practitioner then lifts the shoulder to haul the saber back.
First correction: shorten the cut so the hand does not travel beyond the point where the wrist can remain connected.
Second correction: slow the cut and pause halfway through to inspect the edge direction.
Third correction: return by guiding the saber with the forearm and elbow rather than lifting the shoulder.
Fourth correction: check the feet. If the lead foot or stance has turned excessively, restore the base before repeating.
The conclusion is practical: a smaller cut that returns under control is better training than a larger cut that drags the body out of position. The larger path can be restored later if the form requires it and the structure remains sound.
Common errors that slow wrist-control progress
| Common error | Immediate correction | When the correction may need adjustment |
|---|
| Gripping harder whenever the saber feels unstable | Reduce the range and speed first. Keep the fingers secure without crushing the handle. | A slippery or damaged handle requires equipment inspection, not simply a softer grip. |
| Locking the elbow at the end of every cut | Finish with structure, but retain enough softness to guide the recovery. | Specific forms may use clear extensions; follow your instructor’s method for that form. |
| Watching only the tip of the saber | Practice identifying the edge through the full path, including transitions. | Visual focus varies by drill and form; do not stare at the blade during all practice. |
| Adding speed after one clean repetition | Repeat the same line several times with stable recovery before increasing pace. | Conditioning drills may have a different tempo, but should not remove technical checks. |
| Using shoulder force to recover the weapon | Bring attention back to elbow direction, wrist angle, and waist support. | Very large form movements may involve the shoulder, but it should not be the only source of control. |
Do not judge progress by how loud the saber moves through the air. A quieter, more measured path often reveals better edge awareness. In Chinese martial culture, restraint is not passivity. It is the ability to place force where it belongs and withdraw it when it is no longer needed.
Bring weapon practice into a wider method of cultivation
A dao drill becomes more meaningful when it is connected to empty-hand foundations. Learn Tai Chi in China to study how turning, weight transfer, and relaxed structure can support weapon work without forcing the arm. The principle is shared: movement should arise from coordinated body mechanics, not isolated strain.
SJF Kung Fu School offers nine martial arts styles, including Chinese Weapon, Shaolin Quan, San Da, Qin Na, Tai Chi, Qi Gong, Zhan Zhuang, Ge Dou, and Meditation. Training takes place in a 200-square-metre indoor training centre, allowing year-round practice when weather is unsuitable for outdoor work. For a student refining saber control, a consistent space and direct correction can be more useful than repeatedly changing routines alone.
A real example also shows the value of patient, sustained study. Andrew Williams from the United States spent 30 days training Tai Chi, Zhan Zhuang, and Dao Fa with his son. He described the experience as life-changing for him physically, mentally, and spiritually, and planned to return the following year. His experience should not be treated as a promised result for every student. It does, however, reflect why weapon work is often taught alongside standing practice and body coordination rather than as isolated choreography.
Master Shen’s teaching draws from Liuhe Quan and Chen-style Tai Chi lineage while welcoming learners who come to China to train seriously and respectfully. For an intermediate practitioner, the next step is not to collect more saber techniques. It is to make the techniques already learned quieter, clearer, and more connected.
View the one month Kung Fu Course to ask SJF Kung Fu School about focused Chinese saber practice and training guidance.



 WhatsApp